How to recover from being locked out of your EC2 instance
3.4.2014
I have been working on a few projects using Amazon Web Services and specifically the free EC2 tier. It's a great way to get acclimated to the AWS platform. I foolishly only put my .Pem key file on a laptop and never copied it anywhere else. This is the first lesson to be taken. Having a secure backup location will save a lot of headache in the unfortunate event that something happens to your data. Luckily if your EC2 is EBS based there is another way to get back into the instance.
The only requirements for regaining access are that as mentioned it is an EBS based instance and you have access to the AWS Management Console. This was all done from the free usage tier. I have successfully used this on an Ubuntu Server 12.04 LTS Instance, but any with the root device of EBS should have the same capability. Let's take a quick overview of how we're going to regain access to the Instance.
While looking for a solution this post in the AWS dev forums helped guide me. We are interested in the first reply. The process is described as:
If you're running an EBS-backed instance then you can Stop it, attach the root EBS volume to another instance, and place a new public key into the authorized_keys file, then return the volume to the original (stopped) instance and Start the instance again.This is a fairly straight-forward process once you know what to do. Let's break down each action step by step:
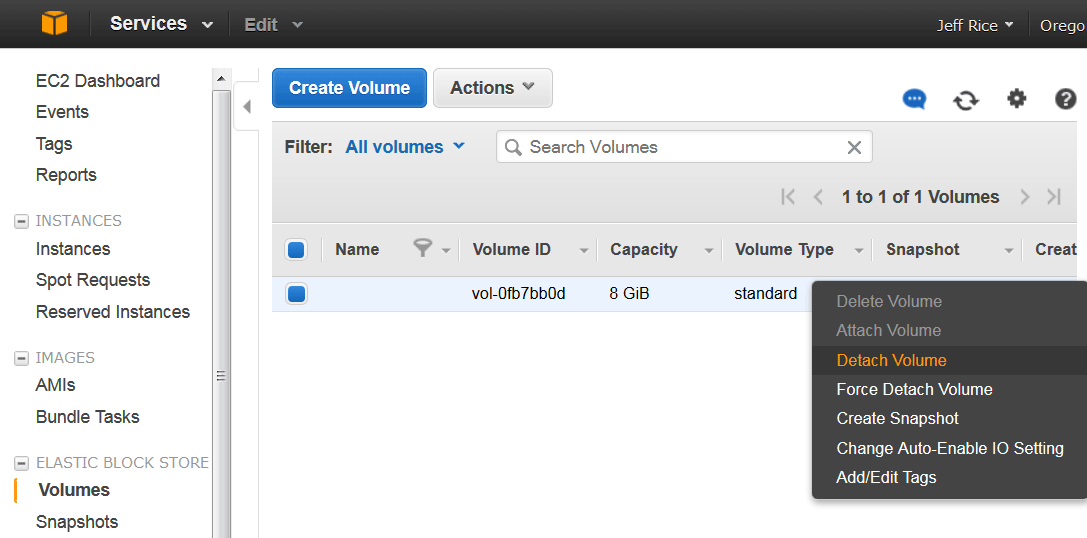
The volumes on instances are detachable from the AWS console. This allows you to transfer your information between instances quickly. It also allows you to access a volume from an instance that you've been locked out of! I was originally using one volume on a free Ubuntu Server 12.04 LTS Instance so we will start with just that instance running. Here are the steps to regaining access to the original volume and the original instance.
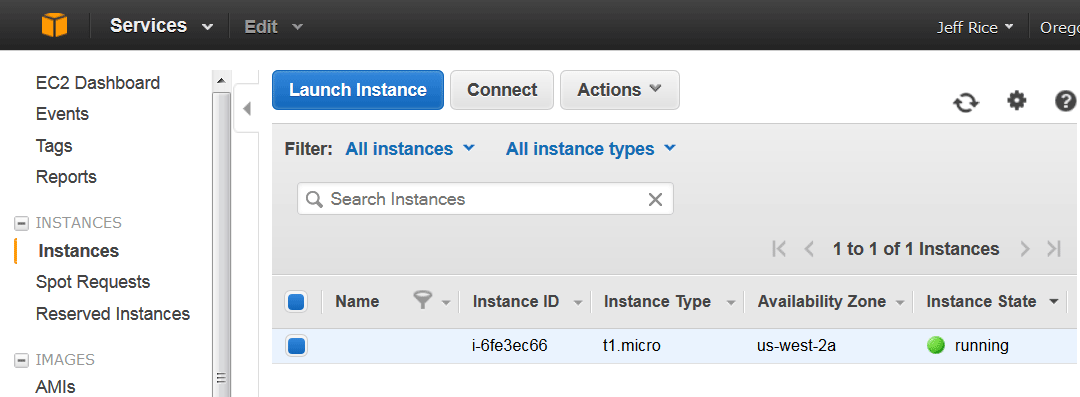
- Access the AWS console. We have our original instance running our original volume. We want to detach this volume and attach it to a new instance. In order to do this we have to stop the instance.
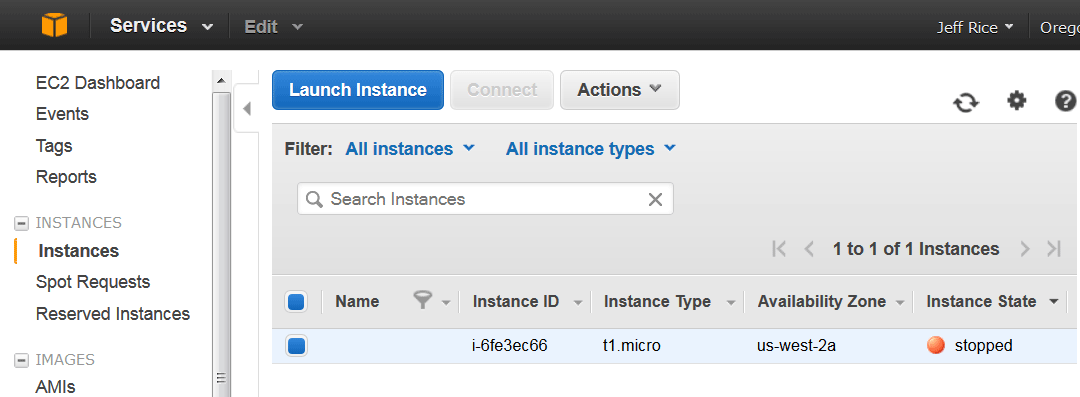
- With the original instance stopped we can detach the original volume.
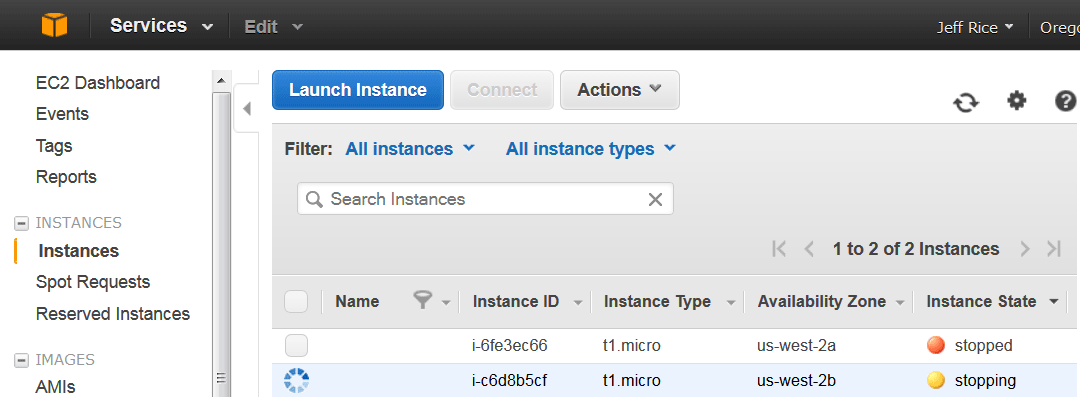
- Now we want to move the original volume to an instance that we have access to. Since We only have one instance running we will have to start another. When we create a new instance in the AWS console, we make it the same type of instance as the original was, but we will create a new key pair. This time we place the Pem key in two secure locations! This new key can be used to access both instances after the remaining steps have been completed.

- Now we need to put the original volume on our new instance. Stop the new instance, detatch the new volume, and then attach the original volume to the new instance.
You may need to change the device location to sda1. This is the root device location for EBS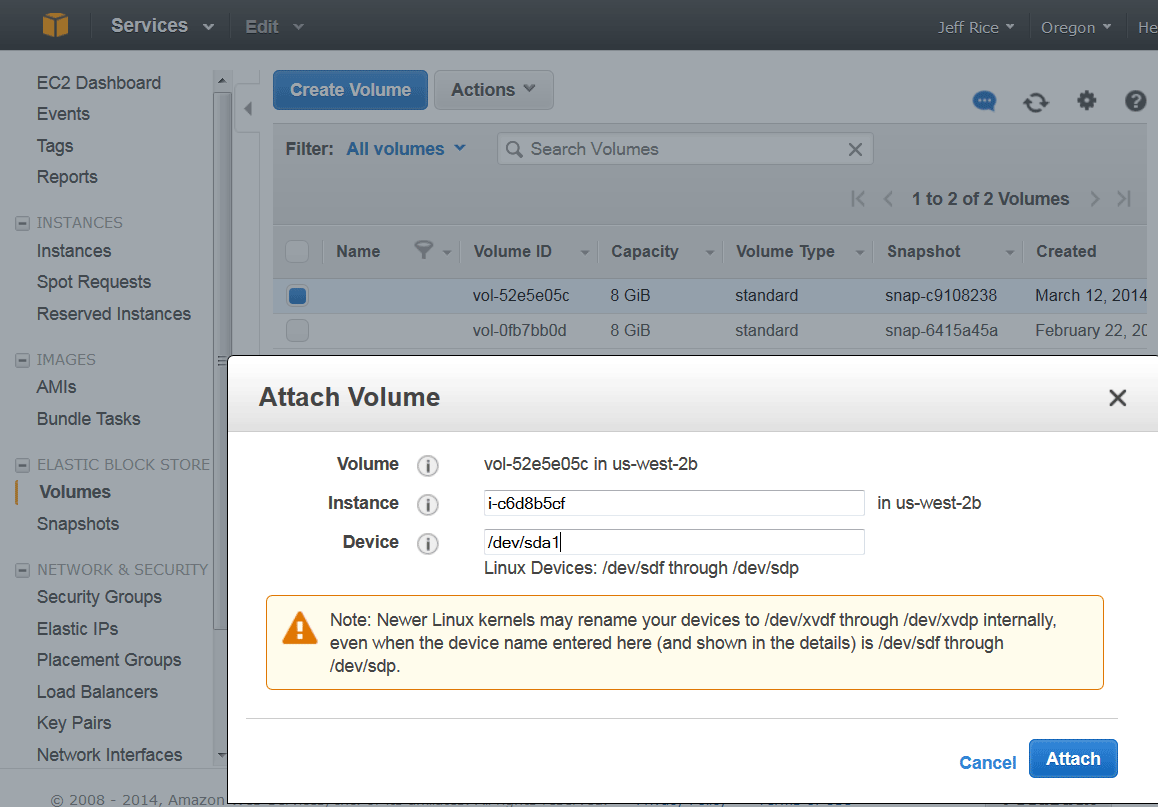
- Almost finished. Now start up the new instance and we have access to our original volume with our new key pair! We're going to keep going and add the new key to the original volume.
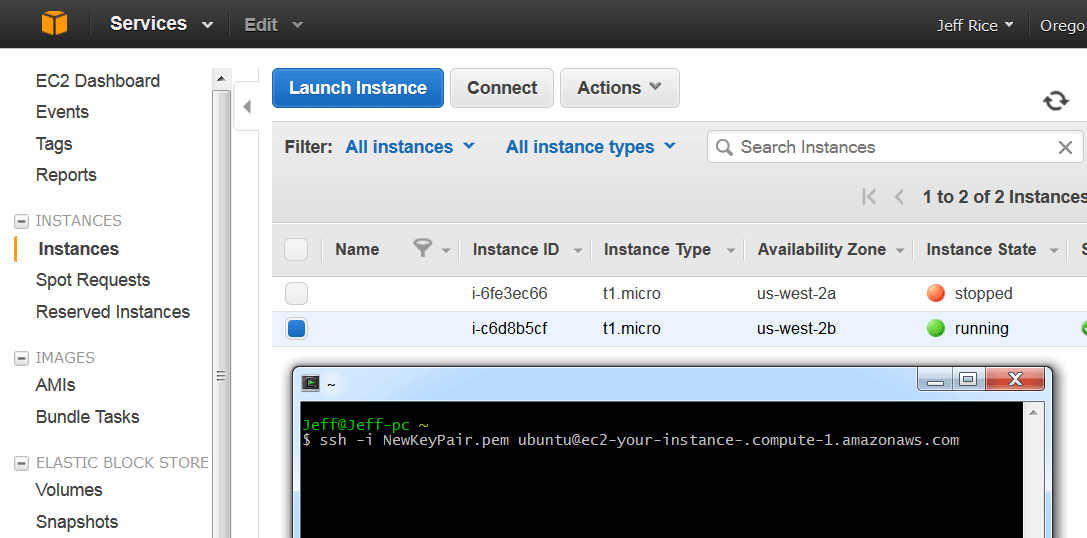
- On this Ubuntu server the key is located in .ssh/authorized keys. Now we can change this to match the new key we created.
- All that's left is to return the original volume to the original instance which should be easy by now. So now we can access the original instance and the original volume with the our new key. The extra instance and volume we created can be terminated or kept running.
